Giant Paper Snowflake Craft with the Kids
As travel slows down this year, we’ve been focusing on what fun activities we can do as a family. My oldest girl, of course, wanted to lead the family in a craft. Her aunt had taught her two years ago how to make giant snowflakes, and they are pretty cool! These giant, paper snowflakes can be done with older kids (above 5 can usually manage this fine!) and with a little help for the younger ones. These instructions show you how to make an 8-point snowflake. It’s full and beautiful and can be done with minimal supplies!
Let’s Jet, Kids! uses affiliate links. As an Amazon (and other networks) Associate, I earn from qualifying purchases. It is no extra cost to you.

Giant Paper Snowflakes- Supplies
8 pieces of computer paper (white, or any color if you want colorful snowflakes)
scissors
glue stick or stapler (we use both!)
How to Make a Giant Paper Snowflake
Begin by cutting each paper into perfect squares. You can do this by measuring, or by folding a short side of paper over to a long side of paper so the edges align, and then cutting off the excess.
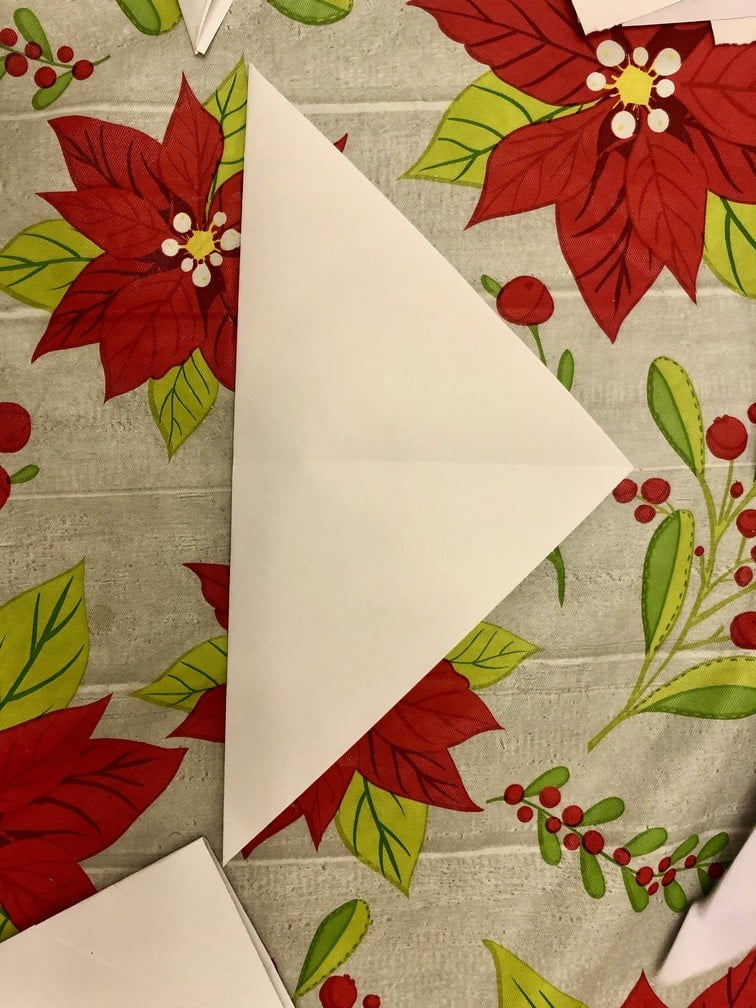
Now that you have a square, fold diagonally into a triangle. Then fold in half into a smaller triangle.
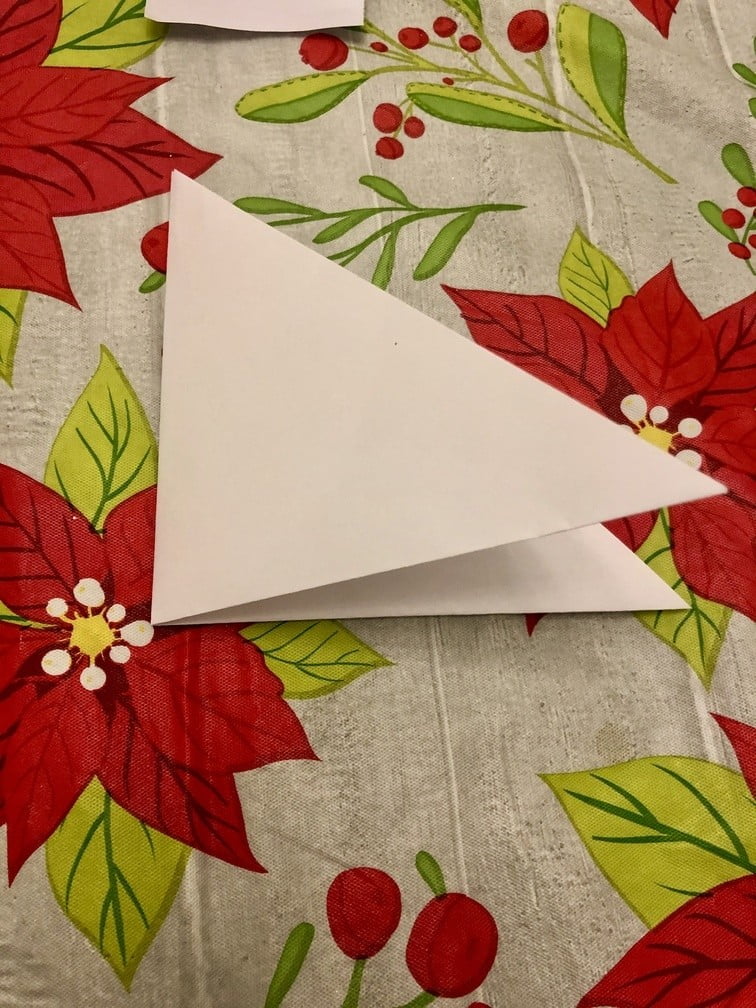
Holding the smaller triangle, find where the folded edge is. In the second picture above, the fold is on the left side. Take some scissors and make a straight cut from the fold to about a half-inch from the opposite edge. You will be cutting through all the layers at once. You will NOT be cutting ALL the way to the other side. It will almost look like gills on a shark 🙂
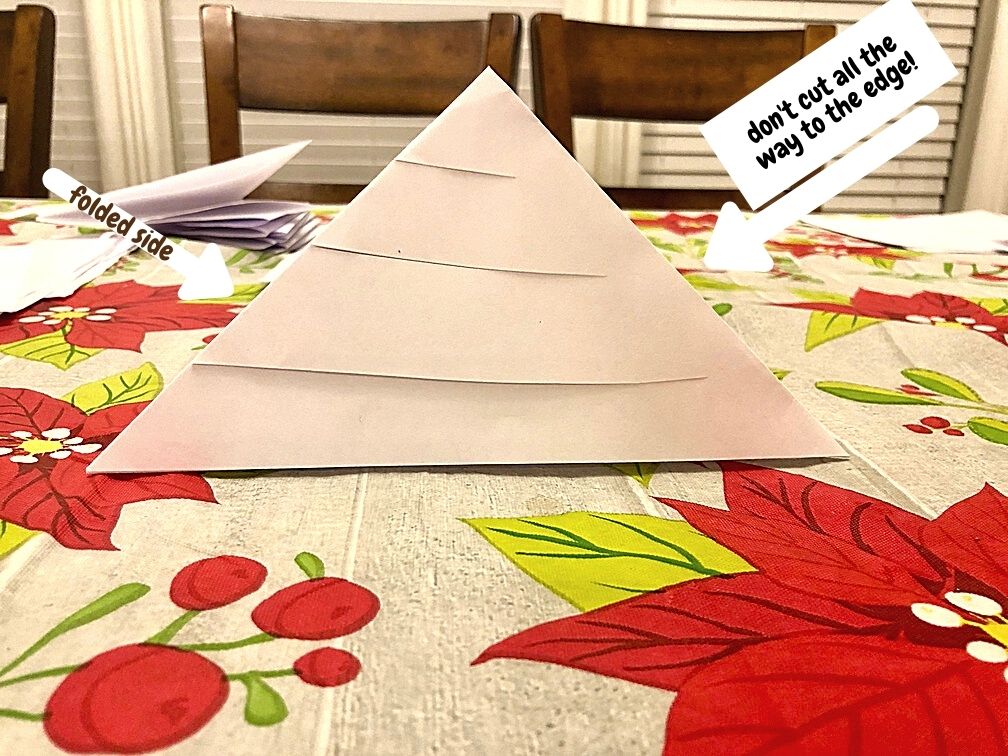
Repeat with all the triangles.

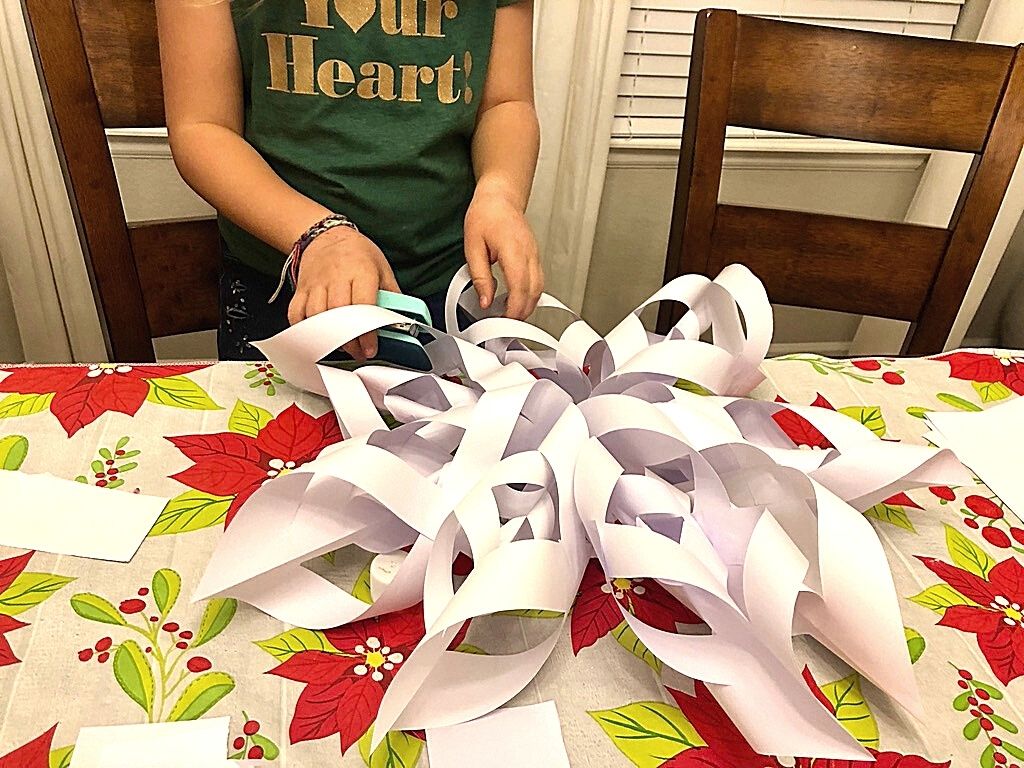
Shaping the Design
Next, open up the square. It should look like this:

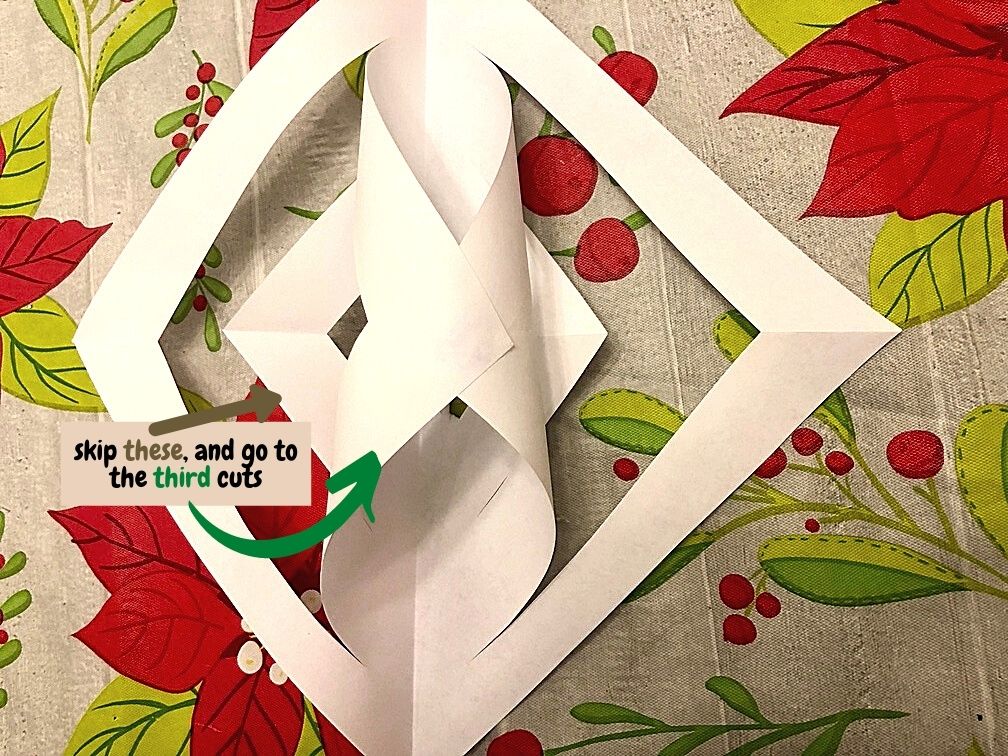
Take the inside two cuts (right in the middle, one on each side of the fold) and round them into each other. Glue them together flatly near the ends, one on top of one-another (bottom-top touching, not bottoms together.) Sometimes I stick my pinky finger in so the paper doesn’t smash. After I glue them together, I pinch them for 5-10 seconds until the glue has a good hold on it.
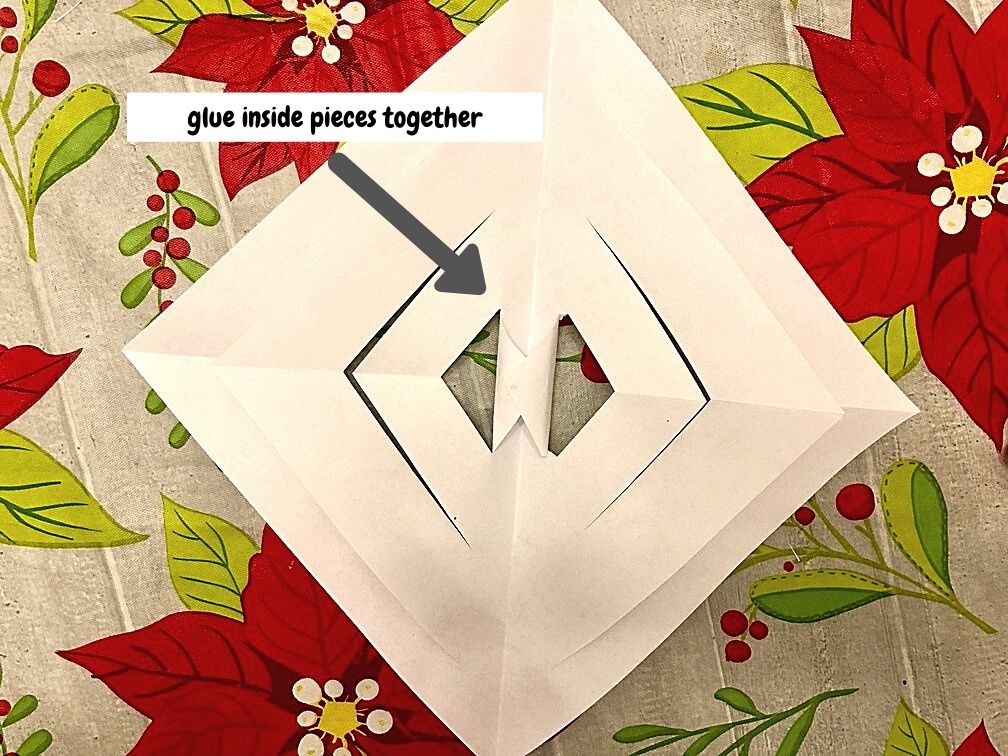
Skips the next set of cuts on both side, and go to the 3rd cuts. Repeat, gluing them together near the ends of the paper.
Now flip over your snowflake and, beginning with the innermost cuts, repeat the folding and gluing.
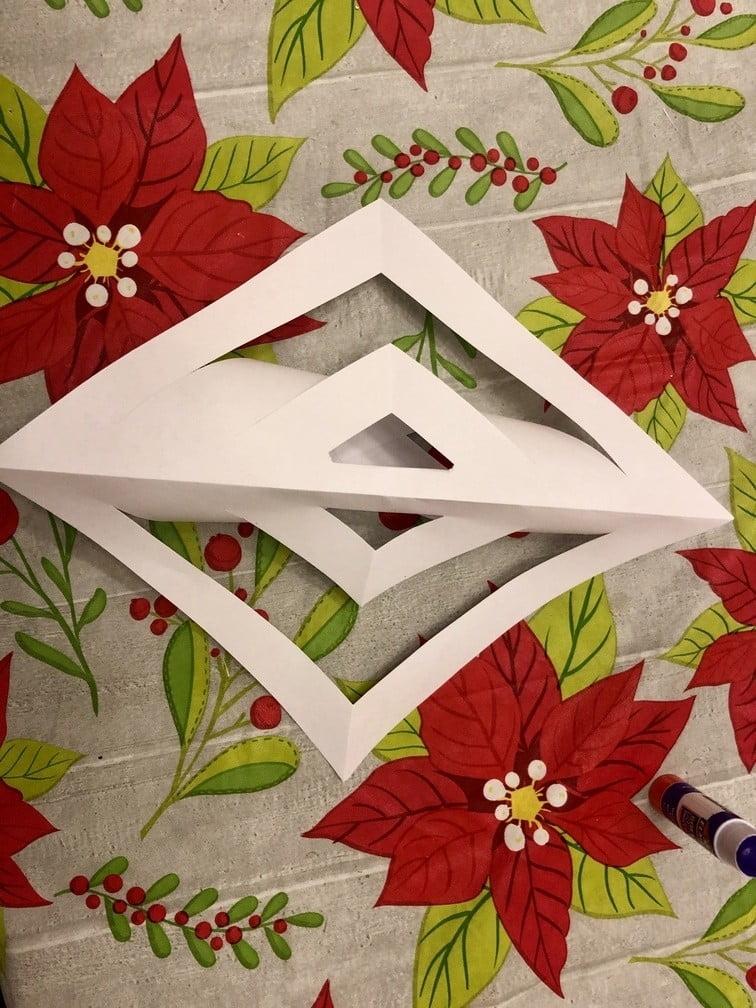


Repeat these steps with the remaining 7 papers you have, currently in triangles with their “gills”.
Assembling the Snowflake
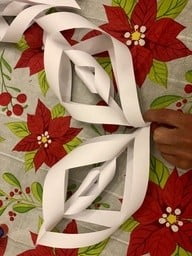
We will begin with two sections, and then add another section of the snowflake one-by-one.
Take two sections of the snowflake and align the ends together on bottom. Glue them together (I glue about an inch of paper to get a good hold). Pinch the ends together until the glue has settled a bit. Repeat, gluing the next section at the end. Keep gluing them together at the ends. All the ends will be going the same way (not opposite each other.) Then, put a staple through all the pinched ends with one staple. This will help since the weight of all 8 cannot be held with a glue stick very well!
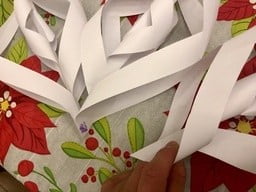
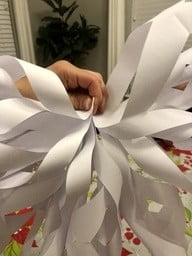

The snowflake should now stay together in the middle. But it is still a little floppy, so we need to attach each side to the adjacent side. Finding where the design makes an “X” on the side of each section, align it with the “X” on the adjacent section of snowflake and staple them together. You won’t be able to see the staple, as it is on the inside!

Go all the way around the snowflake, stapling each side to the next, and then you’re done!

This giant paper snowflake craft is fun and not too hard for kids! You can make a bunch and decorate your home into a winter wonderland, with just basic supplies!
You may also like:
How to Have a Chocolate Tasting at Home


Omg I have these so many times and had no idea how to make them! Totally going to do this!
Awesome! They are so fun!
Wow these huge snowflakes are sooooo cool!
I made simpler variations of these as a kid but these are so much cooler!
So much prettier than my paper snowflakes.
One of my FAVORITE crafts as a kid was making snowflakes. This is awesome!
These are beautiful. Simple and cheap kraft to add a little holiday spirit at home. Didn’t realized how big they were going to be!
Awww these are so fun. I love any type of paper craft.
How cool! And definitely not just for kids – I think I will have just as much fun making these as my kids will🥴
These snowflakes are soooooo cool! Thanks for the awesome tutorial!
Great idea!
So cool! I used to love cutting out snowflakes as a kid, but this is some next-level stuff!
Lovely snowflakes. I’ve always wondered how they were made. They seem really fun to make and looks so cool.
Thank you! They are really fun to make!